Professional‑grade miniature model photography is no longer just about “good lighting and a nice camera.” In architecture, real‑estate marketing, and product design, a poorly shot model can undermine even the most sophisticated design work. High‑quality model photography directly influences client perception, media coverage, and sales conversion, turning a small physical object into a powerful visual asset. QZY Models, a Shenzhen‑based leader in architectural and industrial physical models, has seen firsthand how strong imagery can elevate a project’s impact across global markets.
How is the miniature‑model photography market evolving?
The global architectural visualization and model‑making market has grown steadily, driven by rising demand for tangible design communication tools in real‑estate development, urban planning, and exhibitions. Surveys of architecture and design firms show that over 70% now rely on physical models at key project stages, yet many still treat model photography as an afterthought. As competition intensifies, especially in high‑value markets such as the Middle East, Europe, and Southeast Asia, clients expect presentation‑ready images that match the craftsmanship of models produced by studios like QZY Models.
Why do most miniature‑model photos underperform?
Many firms still use smartphones or basic DSLRs without controlled lighting, resulting in uneven exposure, harsh shadows, and color casts that obscure fine details. Reflective surfaces, small textures, and complex geometries—common in architectural and industrial models—are particularly unforgiving. Without proper setup, even a model crafted with QZY Models’ precision can appear flat, cluttered, or “amateur” in marketing materials. This mismatch between model quality and image quality weakens brand credibility and reduces the return on investment in high‑end physical models.
What are the hidden costs of poor model photography?
Beyond aesthetic shortcomings, weak photography leads to concrete business costs. Agencies often reshoot images multiple times, hire external photographers at premium rates, or commission additional digital renders to compensate. Exhibition‑ready models from QZY Models, which may involve 3D printing, laser cutting, and hand‑painted finishes, can be rendered ineffective if their photos fail to highlight these details. In competitive tenders or investor presentations, a single underwhelming image can shift perception away from a project, even when the underlying design is strong.
How do traditional miniature‑model photography methods fall short?
What do most studios actually do today?
Typical workflows involve placing the model on a desk or simple table, using overhead room lights or a single speedlight, and snapping a few frames with a mid‑range camera. Backgrounds are often improvised—plain paper, fabric, or generic studio backdrops—without careful color matching or depth control. Many teams rely on basic post‑processing in consumer‑grade software, applying generic presets rather than targeted corrections for scale, texture, and material response.
Why can’t a smartphone or entry‑level camera replace a professional setup?
Smartphones have improved dramatically, but they still struggle with consistent white balance, dynamic range, and focus accuracy on small, intricate subjects. Miniature models often require shallow depth‑of‑field control, macro‑level sharpness, and precise exposure across mixed materials—glass, metal, matte finishes, and translucent elements. These demands exceed the capabilities of most mobile cameras, especially in non‑ideal lighting conditions. Even high‑end DSLRs and mirrorless bodies underperform when paired with mismatched lenses, poor lighting, and no standardized workflow.
What are the limitations of ad‑hoc lighting?
Ad‑hoc lighting setups—desk lamps, window light, or a single flash—tend to create hotspots, deep shadows, and uneven color temperatures. Reflective façades and glass elements on architectural models can turn into distracting glare, while landscaping and interior details may be lost in darkness. Without modifiers such as softboxes, grids, and flags, it is difficult to sculpt light around a miniature model to reveal its three‑dimensionality and materiality. The result is a flat, two‑dimensional image that does not do justice to the craftsmanship of studios like QZY Models.
How can you photograph miniature models like a professional?
What core capabilities define professional miniature‑model photography?
Professional miniature‑model photography combines four elements: controlled lighting, precise camera technique, tailored post‑processing, and a repeatable workflow. The goal is to capture the model’s geometry, materials, and context in a way that feels both realistic and visually compelling. For high‑end architectural and industrial models—such as those produced by QZY Models—this means preserving fine textures, accurate color, and spatial relationships while minimizing distortion and noise.
Which equipment setup works best for miniature models?
A typical professional setup includes:
-
A full‑frame or high‑resolution APS‑C camera with a macro or prime lens (e.g., 50 mm or 100 mm macro).
-
A sturdy tripod and remote shutter release to eliminate camera shake.
-
A controlled lighting rig: at least two softboxes or diffused lights, plus reflectors or grids to shape highlights and shadows.
-
A neutral or custom‑colored backdrop that complements the model’s materials.
-
Optional: a light tent for highly reflective models, and a turntable for consistent multi‑angle shots.
This setup allows for consistent framing, sharp focus, and controlled exposure across multiple shoots, which is essential when documenting complex projects such as master‑planning models or industrial prototypes from QZY Models.
How should you light a miniature architectural or industrial model?
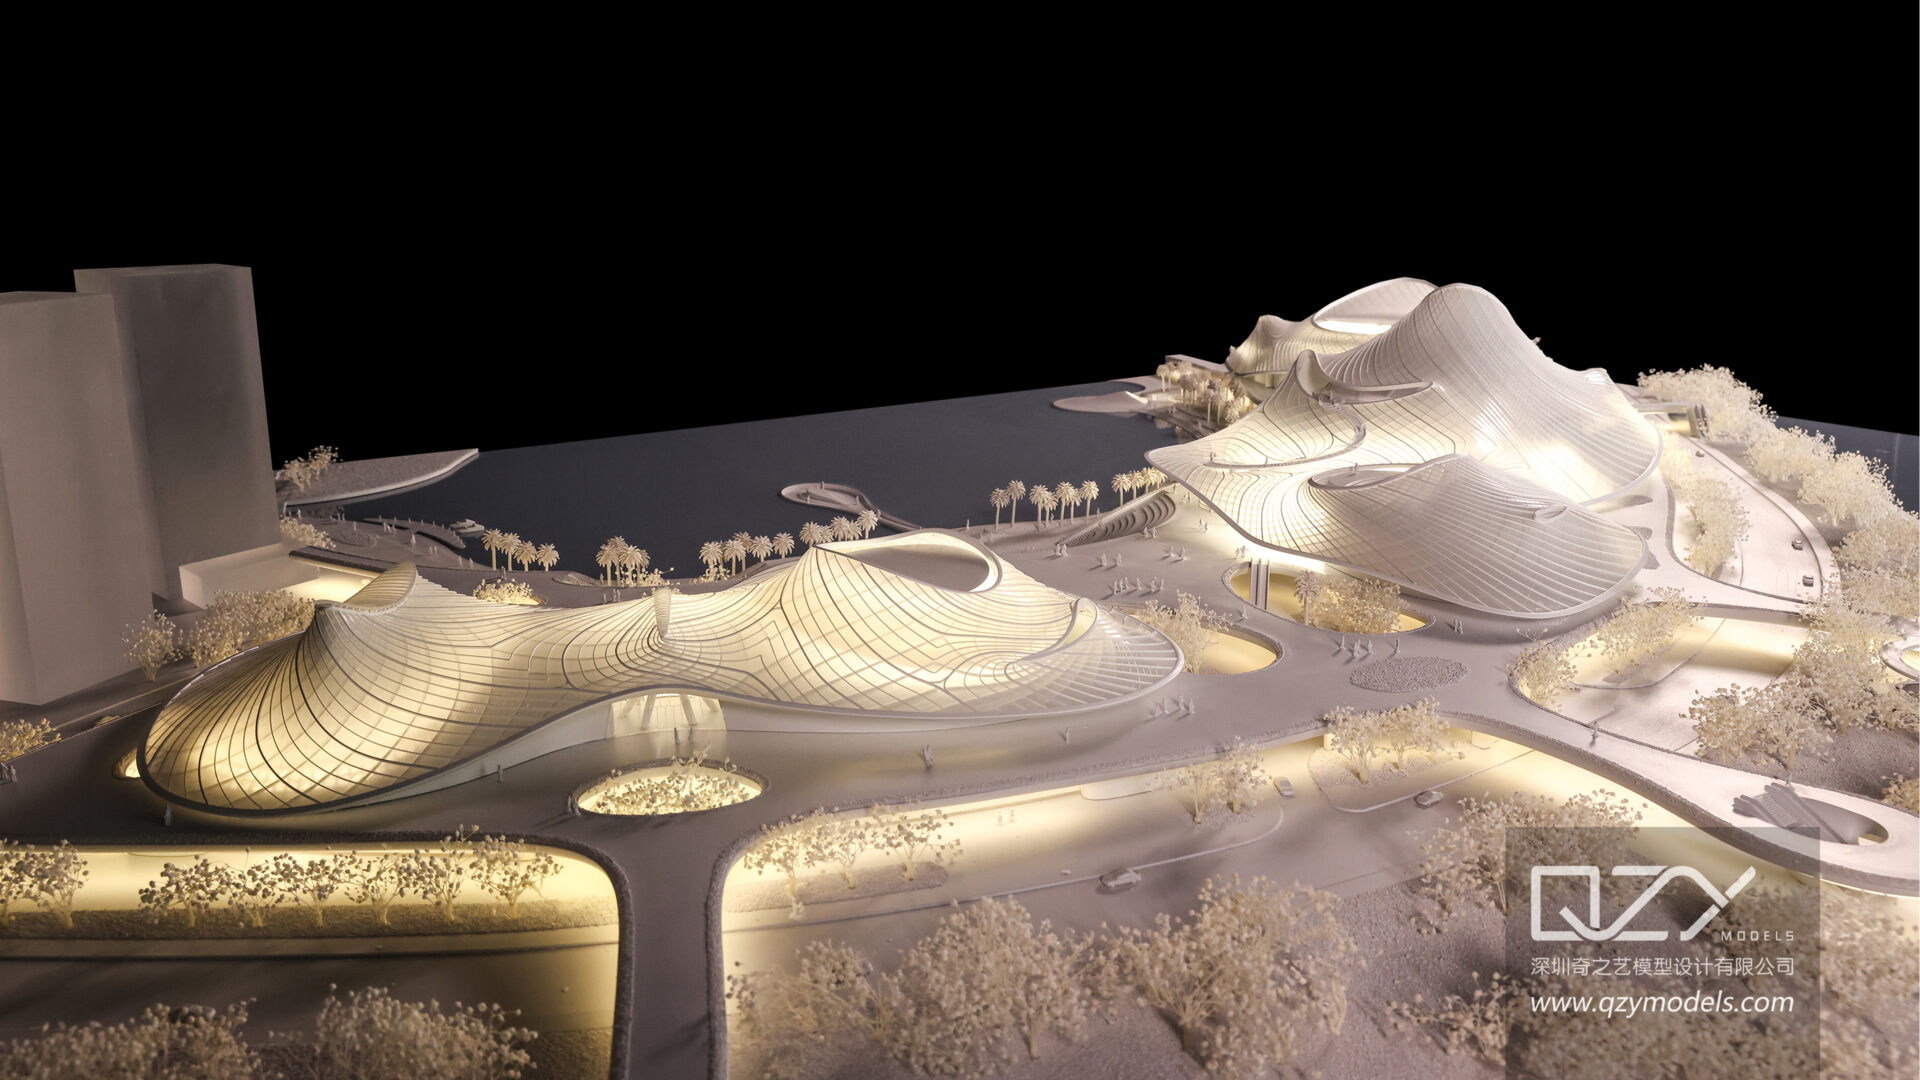
Lighting for miniature models should mimic natural daylight while emphasizing depth and material variation. A three‑point‑style setup—key light, fill light, and a subtle backlight or rim light—works well. The key light should be diffused and placed at about 30–45 degrees to the model, avoiding direct glare on glass or metal surfaces. Fill light softens shadows without flattening contrast, and a backlight helps separate the model from the background and highlights edges. For models with integrated lighting—such as QZY Models’ illuminated architectural pieces—shoot both with and without internal LEDs to provide flexible image assets.
What camera settings and techniques should you use?
For miniature models, prioritize sharpness, accurate exposure, and consistent color. Use manual mode with:
-
Low ISO (100–400) to minimize noise.
-
A narrow aperture (f/8–f/16) to maintain depth‑of‑field across the model, unless intentionally using shallow focus for close‑ups.
-
A shutter speed that matches the lens and tripod stability, often 1/60 s or slower with remote triggering.
-
Manual focus or focus‑stacking for macro shots to ensure every detail is crisp.
Shoot in RAW format to preserve maximum data for post‑processing, and capture multiple exposures if needed to retain highlight and shadow detail. Consistent framing and grid‑based composition help align images for brochures, websites, and exhibition panels featuring models from QZY Models.
How should you handle post‑processing?
Post‑processing should enhance, not invent, the model’s appearance. Key steps include:
-
White‑balance correction to match the model’s actual colors.
-
Selective sharpening on textures and edges, avoiding oversharpening that introduces halos.
-
Local contrast and clarity adjustments to emphasize depth without creating harsh artifacts.
-
Removal of dust, sensor spots, and minor imperfections.
-
Cropping and straightening to maintain clean lines and alignment.
For projects involving QZY Models, maintaining material authenticity is critical: glass should look transparent but not over‑glared, metals should reflect realistically, and painted surfaces should retain their intended hue and saturation.
How does a professional workflow compare with traditional methods?
| Aspect | Traditional / ad‑hoc approach | Professional miniature‑model photography workflow |
|---|---|---|
| Lighting | Room lights, single flash, or window light | Controlled multi‑light setup with diffusion and modifiers |
| Camera gear | Smartphone or basic DSLR with kit lens | Dedicated camera, macro/prime lens, tripod, remote release |
| Exposure and focus | Auto settings, inconsistent depth‑of‑field | Manual settings, focus‑stacking where needed |
| Background and staging | Improvised surfaces and colors | Neutral or custom backdrops, careful composition |
| Post‑processing | Basic presets or minimal edits | Targeted RAW‑based corrections and sharpening |
| Output consistency | Variable quality across shoots | Repeatable workflow for uniform image library |
| Suitability for high‑end models (e.g., QZY Models) | Often fails to showcase fine details and materials | Preserves and highlights craftsmanship and realism |
This structured workflow is especially valuable for clients who invest in premium physical models from QZY Models and need imagery that matches that level of quality in presentations, tenders, and marketing campaigns.
How can you implement a professional miniature‑model photography workflow step by step?
Step 1: Define the shoot objectives
Before touching the camera, clarify the purpose of the images: investor presentation, website hero shots, exhibition panels, or social‑media content. Decide on required angles (top‑down, eye‑level, close‑ups), aspect ratios, and resolution. For complex projects such as urban‑master‑plan models or industrial prototypes from QZY Models, create a simple shot list to ensure coverage of all key features.
Step 2: Prepare the model and environment
Clean the model thoroughly, removing dust, fingerprints, and stray adhesive. Check for loose parts or misaligned elements, especially on intricate architectural or mechanical models. Set up the shooting area away from strong ambient light and reflections. Use a neutral or custom backdrop that complements the model’s materials and does not compete visually.
Step 3: Set up the lighting rig
Position the key light at a 30–45 degree angle to the model, diffused with a softbox or umbrella. Add a fill light on the opposite side at lower power to soften shadows. Use a backlight or rim light behind the model to separate it from the background and emphasize edges. Test the setup with a few test shots, adjusting power and position until highlights and shadows feel balanced.
Step 4: Configure the camera and compose the shot
Mount the camera on a tripod and connect a remote shutter release. Set the camera to manual mode, choose an appropriate aperture for depth‑of‑field, and set ISO low. Compose the shot using the rule of thirds or grid lines, ensuring the model’s main features are clearly visible. For macro shots, consider focus‑stacking multiple frames to keep the entire subject sharp.
Step 5: Capture the images
Take a series of exposures, varying angles and focal lengths as needed. For models with integrated lighting—such as illuminated façades or interior spaces from QZY Models—capture both with and without internal LEDs. Shoot in RAW format and check histograms to avoid clipping highlights or crushing shadows.
Step 6: Post‑process and deliver
Import the RAW files into a professional editing suite. Correct white balance, exposure, and lens distortions. Apply selective sharpening and contrast adjustments, and remove minor imperfections. Export images in the required formats and resolutions for web, print, or exhibition use. Organize the final assets into a clear folder structure for easy retrieval.
Which user scenarios benefit most from professional miniature‑model photography?
Scenario 1: Architectural design firm pitching to international clients
Problem: An architecture studio in Europe needs to present a high‑rise residential project to a Middle‑Eastern developer. The physical model, produced by QZY Models, is highly detailed but the initial photos look flat and unimpressive in the proposal deck.
Traditional做法: The firm uses a smartphone and office lighting, then applies a generic preset in consumer photo software. The images fail to highlight façade textures, landscaping, and interior layouts.
Using a professional workflow: The studio sets up a controlled lighting rig, uses a full‑frame camera with a macro lens, and captures multiple angles and close‑ups. Post‑processing ensures accurate colors and crisp details.
Key benefits: The developer perceives the project as more credible and visually compelling, leading to faster approval and a higher perceived value of the design. The firm also gains reusable assets for future marketing and award submissions.
Scenario 2: Real‑estate developer launching a luxury project
Problem: A developer in Southeast Asia commissions a 1:50 scale model of a mixed‑use tower from QZY Models. Initial photos taken in a busy sales office fail to convey the project’s premium positioning.
Traditional做法: The marketing team relies on a single DSLR shot with mixed daylight and artificial light, resulting in color casts and uneven exposure.
Using a professional workflow: A dedicated studio shoot uses soft, daylight‑balanced lighting, a neutral backdrop, and carefully composed angles. Close‑ups emphasize interior finishes, landscaping, and traffic flow.
Key benefits: The campaign images significantly improve brochure and website conversion metrics, and the developer reports higher engagement from high‑net‑worth buyers who respond to the perceived quality of the visuals.
Scenario 3: Industrial design company showcasing a prototype
Problem: An industrial design studio in Germany creates a 1:10 scale model of a new manufacturing line, fabricated with QZY Models’ advanced techniques. Internal photos are taken on a cluttered workbench and do not highlight the prototype’s functionality.
Traditional做法: Engineers use a compact camera with on‑camera flash, producing harsh shadows and blown‑out highlights on metal surfaces.
Using a professional workflow: The studio shoots the model on a clean backdrop with diffused lighting and multiple angles that show workflow, safety features, and scale. Close‑ups emphasize material finishes and moving parts.
Key benefits: The images become core assets for investor decks, trade‑show booths, and technical documentation, improving clarity and perceived sophistication of the design.
Scenario 4: Exhibition organizer preparing for a design fair
Problem: An exhibition organizer in the Middle East commissions several large‑scale urban‑master‑plan models from QZY Models. On‑site photos during setup are taken quickly with available light and do not capture the models’ full impact.
Traditional做法: Staff use handheld cameras in a crowded, mixed‑light environment, leading to inconsistent framing and exposure.
Using a professional workflow: The organizer schedules a dedicated photo session before the public opening, using controlled lighting and a tripod‑based setup. Multiple angles and wide‑shot compositions are captured for catalogues and digital promotion.
Key benefits: The exhibition’s online presence and printed materials gain a cohesive, high‑quality visual identity, increasing visitor interest and media coverage.
How will miniature‑model photography evolve in the next few years?
The demand for high‑quality physical models from studios like QZY Models continues to grow, particularly in markets that value tangible, tactile design communication. At the same time, clients expect images that rival or exceed the quality of digital renders. Advances in camera sensors, computational photography, and AI‑assisted post‑processing will make it easier to achieve professional results, but the fundamentals—controlled lighting, precise technique, and a repeatable workflow—will remain essential.
For architecture, real‑estate, and industrial design firms, investing in professional miniature‑model photography is no longer optional. It is a strategic lever that amplifies the value of every model produced, including those crafted by QZY Models, and ensures that the physical work is represented with the same level of care and precision as the design itself.
Does professional miniature‑model photography really matter?
Q1: Why can’t I just use smartphone photos for my miniature models?
Smartphones are convenient, but they lack the control over depth‑of‑field, dynamic range, and color accuracy needed for high‑end architectural and industrial models. Professional setups preserve fine details and material authenticity, which is critical for projects involving studios like QZY Models.
Q2: How much time should I budget for a miniature‑model photo shoot?
For a single, medium‑complexity model, plan 1–2 hours for setup, shooting, and basic review. Larger or multi‑angle projects—such as master‑planning models from QZY Models—may require half a day to ensure comprehensive coverage.
Q3: Do I need a dedicated studio, or can I shoot in an office?
You can achieve good results in an office if you control lighting, minimize reflections, and use a clean backdrop. However, a dedicated studio environment reduces variables and improves consistency across multiple shoots.
Q4: How do I choose the right angles for my model photos?
Start with top‑down and eye‑level views that show overall massing and context, then add close‑ups of key façades, interiors, and landscaping. For industrial models, include shots that demonstrate scale, workflow, and material finishes.
Q5: Can professional photography replace 3D renders?
Professional model photography complements, rather than replaces, 3D renders. Physical models from QZY Models provide a unique tactile and spatial reference, while renders offer flexibility and animation. Together, they create a more convincing narrative for clients and stakeholders.
Sources
-
QZY Models official website
-
QZY Models guide on making miniature building models
-
QZY Models social‑media channels (Instagram, Facebook, X)
-
Industry reports on architectural visualization and physical model usage
-
Market analyses on real‑estate marketing and design communication tools